Last me just say, I spent hours researching Linux supported laptops and the best reviews were always for the Dell XPS 13. It looked sleek with its aluminum body, minimal weight, and infinity display. I decided to opt for the Developer Edition for a variety of reasons which I will address further in this article, but the biggest reason was the it ships with Ubuntu 14.04 so I knew the hardware would be Linux compatible.
When I opened the box, I was actually concerned at how small this laptop seemed. But once I opened the lid, that concern was dispelled upon seeing the infinity display.
Set-up:
On first boot, the Ubuntu set-up menu came up and I followed the process out of impatience for wanting to play with my new laptop. Once I played with Ubuntu for about five minutes, I busted out my trusty UEFI Liveusb of Arch Linux and wiped Ubuntu off the device real quick. I followed [THIS] installation guide which is very solid. But, once I upgraded my Arch system after booting for the first time, my system broke. My root partition upgraded to the 4.6.4 kernel but my /boot partition remained operating with the 4.1 kernel.
The problem was simple, My root partition and /boot partition were not communicating due to improper mounting. This seems to be a common pitfall of installing Linux on an UEFI system, since it's formatted to fat32 and I choose to use systemd-boot as the guide suggests. The fix was generate an fstab file so these two partitions could communicate. Once I generated this file using the UUID of both partitions, my problems were fixed.
The processor:
Since I love playing games (yet aware that a laptop is the not ideal route for 3D gaming), I quickly installed Steam and downloaded an indie game I’ve found enjoyable, The Long Dark. Surprisingly, the game was running at a lower frame-rate at the lowest quality settings for the XPS than my 2008 MacBook Pro. This perplexed me as one of the reasons I chose this laptop was that it had a dedicated Intel® HD Graphics 520 graphics card. Thanks to the Arch Linux forums, someone recognized that I had one of my flags in my mkinitcpio.conf was loading frame buffer compression for the i915 driver. After altering i915.enable_fbc=1 to i915.enable_fbc=0 in my MODULES options, the system was running the game on high quality textures without any lag. Though I'm sure this means sacrificing some battery life.
I decided to further the endeavor for smoother gaming by also installing Openbox for when I run steam. With this flag enabled, I'm feeling the performance I'd expect out of a machine with a dedicated graphics card, another reason I went with the XPS 13.
Battery:
Since this is a laptop, I installed tlp and thermald through the AUR to optimize battery life. Currently, the only I've found that I get about 8 hours of battery life out of light use (web browsing, document writing). And when I'm running something that is demanding for the processor (such as compiling a custom kernel), I've been getting about 3 hours of battery life. Watching Netflix in chromium seems to balance out around 5-6 hours of battery life. From a dead battery, it take about hour and a half to recharge back to full which feels very rapid to me. Overall, I’m really pleased with the length of the battery life.
Wireless:
What I didn’t realize when opting for the Developer Edition was that this meant instead of it shipping a Broadcom wireless card requiring proprietary software, it shipped with an Intel 8260 wireless card which is currently supported in the Linux kernel and runs at incredible speeds. Previously, I was getting about 300 KB/s for download speeds on my 2008 MacBook Pro running Arch while sitting in my bedroom. With the XPS 13, I’m getting just under 2 MB/s! This increase feels blazing fast to me. To handle wireless, I went with NetworkManager since it works natively in GNOME and had no issues with setting it up.
Graphics and Display:
From the reviews I read, benchmark tests placed the FHD version with an Intel i5 processor alongside the QHD version with an Intel i7 processor. Since I had absolutely no intention of ever using a touch-screen on my laptop, I decided the FHD screen would fit my needs and my budget. Since I opted for the non-touch version, my screen resolution is significantly lower than that of the touch versions (1920 x 1080 vs 3200 x 1800), but I’m still highly satisfied with the display.
Keyboard:
The keyboard is set up beautifully and is very responsive with a nice feel. The back-light is well designed and the BIOS are set up so that it fades to off automatically after a few seconds of inactivity, a feature which I find to give this computer a very modern and elegant feel.
Touch-pad:
Upon installing the synaptics driver, my touch-pad has worked pretty perfectly without much need for configuration. The only real change I made was to reduce the Clicktime variable, which mostly just makes me feel like my system is more responsive.
Webcam:
Warning: It's weird. It's located in the bottom left of the screen due to the infinity display which create a weird angle for video chatting. But when it comes to Skype sessions, it's not that big of a deal for me. If you were shooting for a webcam with good commercial production value, this is not the computer for you. But if you're like me and only occasionally video chat with other folks, it's pretty sufficient. I would mark this as a compromise but it's a compromise that I, personally, am very willing to make.
Storage:
The version I bought has a 256GB SSD so through utilizing the Arch Wiki SSD Optimizations, that need was met. I've already managed to fill about 32GB of the drive with just steam games, which worries me since there are no movies or music on it yet. But luckily, I also have a 256GB SSD external hard drive so space shouldn't be too much of an issue.
I also decided to commit a major sin and enable a Swap file, as opposed to a Swap partition or as it's recommended for SSD's, not having Swap at all. Enabling Swap on an SSD is supposed to create unnecessary wear on the drive but upon further research, this wear is actually very minimal. I can't seem to find the article outlining the exact numbers but in order to completely burn out an SSD, you would need to write to the drive something like 20GB a day for ten years. I set my vm.swappiness to a low setting and my system is yet to have even touched it.
Ram:
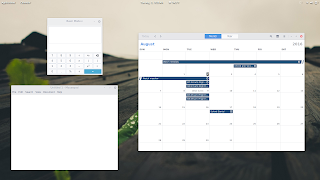
The developer edition ships with 8 gigs of RAM which I've found this to be more than sufficient to accomplish basically any task I need to. I opened every application I could think of/installed (Steam, Spotify, Skype, Terminator, Chromium plus 6 tabs, the entire Libreoffice suite, gnome calendar, gnome calculator, etc.) and my RAM topped out at about 3GB, out of the 8 available.
As I write this review I'm using 2.65GB of RAM and I'm compiling the Linux kernel, writing this in Libreoffice Writer, and running chromium with three tabs for reference, and I'm experiencing no lag in my applications or window switching. Since I'm a broke college student and never had the opportunity to have a nice desktop rig, this is rather impressive by my standards.
My Desktop:
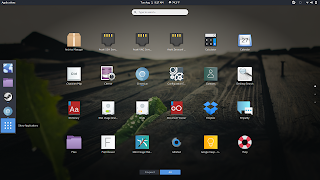
Lately, I’ve been opting out of using a Display Manager. I’ve found it preferable to not boot straight to a GUI as when I have problems, they are easier to fix from the system terminal. For a Desktop Environment, I chose GNOME 3. I really love the minimalist feel of GNOME and the wide range of people contributing themes to get a sleeker looking system (a huge plus when I’m trying to switch friends/family to Linux). Another big plus of GNOME is the stability. I've never run into a stability problem with GNOME which is something to be said.
For my GTK and Shell theme I'm using Arc and for my Icon theme I'm using Vivacious, both of which are available to install through the AUR.
Conclusion:
There are some excellent resources for installing Linux on this machine but lots of research has allowed me to optimize this machine to a level that I'm extremely satisfied with along with compiling a custom kernel to further this optimization. Keep an eye out for a kernel compilation guide for this device in the future.


