Tuesday, November 29, 2016

Part 1 - PoisonTap: Setting up the backend

This is the first in a series on how to set up PoisonTap, by Samy Kamar.
Poison Tap, a USB device that costs no more than $5, can hack into web browser cookies and other parts of any computer just by being plugged into a spare USB port, claims Samy Kamkar, the developer of the USB device. Kamkar built the device out of a Raspberry Pi microcomputer. [Source] 

This guide will cover setting up the backend server, which the Raspberry Pi communicates with to transmit data back to the attacker. This guide assumes you're familiar with using ssh along with being comfortable editing some text files.

1. Setting up a VPS

In order to run PoisonTap, you will need a server for the device to communicate with once it infiltrates the target device. In this guide, I'm using Digital Ocean to host the server. Thanks to the folks over at Jupiter Broadcasting, you can use the promo code "heresthething" to get a $10 credit toward your account which can be used for two free months of service.

Once you're signed up, follow Digital Ocean's easy-to-use interface to deploy an Ubuntu 14.04 x64 server with Node.js pre-installed. They will email you your ssh password and use this to log into the server. Once you're in the server, run the command:

apt-get update && apt-get install nginx git

Note: For the purpose of this guide, all commands must be run as root.

This will install nginx and git along with updating the package list.

2. Setting up nginx

The first thing you'll need to do is set up nginx. Create a new file called 'nginx.conf' in '/etc/nginx/conf.d/' and add the following code to it:


server {
    listen 80;

    server_name brighbox.tk;

    root /usr/share/nginx/html/node;
    index index.html index.htm;

    client_max_body_size 10G;

    location / {
        proxy_pass http://localhost:1337;
        proxy_set_header X-Forwarded-For $proxy_add_x_forwarded_for;
        proxy_set_header Host $http_host;
        proxy_set_header X-Forwarded-Proto $scheme;
        proxy_buffering off;
    }
}

The post 1337 can be changed to any port but by changing the port, you will need to edit various config files which I'll go over later.

Then, run the following command to ensure that pm2 is installed on your VPS:


npm install pm2 -g

3. Launching the node.js application

Now that you're all set up, head over to Samy Kamar's github to download PoisonTap, or pull it using git by running the command:

git clone https://github.com/samyk/poisontap.git

Then, change your working directory to the poisontap directory:


cd poisontap

Once in the working directory, we can check that the .js application will run properly by running:


node backend_server.js

If any errors are thrown here, do not fret. There is excellent documentation available regarding node.js and Digital Ocean. You can find this information here.

Once the node.js application is running correctly, you can launch it by running:


pm2 start backend_server.js

Then, you'll need to restart the nginx service:


service nginx restart

And finally, you can make sure that the application is running using the command:


pm2 list

You should see the following:

Expected output from the pm2 list command
pm2 list

And there you have it! Now the backend server for PoisonTap is set up and you're ready to set up your Raspberry Pi Zero to communicate with it! Stay tuned for my guide on setting up the Raspberry Pi Zero with PoisonTap. Please feel free to leave any comments or ask any questions, I'm more than happy to help folks out.

Notes:

The first thing to realize is that it is a Federal crime in the United States to gain unapproved access to digital media. This guide exists for educational purposes only. If you choose to disregard this warning, know that the services running on a target computer will point to your Digital Ocean server, making it very easy for someone to track you down, probably resulting in jail time. Use at your own risk!


StumbleUpon

Wednesday, September 28, 2016

Refined brightness with i3-WM and i3blocks

I'm a picky person and it decided it was high time to clean up the display for my brightness in i3blocks.


In order to control my brightness via the keyboard, I found that I needed to create a bindsym using xbacklight to reflect this in my ~/.config/i3/config. I chose to increase and decrease xbacklight by 10%.

Initial bindsym:


#Brightness controls
bindsym XF86MonBrightnessUp exec "xbacklight -inc 10 ; pkill -RTMIN+1 i3blocks"
bindsym XF86MonBrightnessDown exec "xbacklight -dec 10 ; pkill -RTMIN+1 i3blocks"


The problem I found with this is that xbacklight increases and decreases based on percentage values of the total maximum brightness for the screen, which on my system is 937. This meant that if i3blocks displayed my brightness at 100% and then I decreased it by 10%, the next value displayed was 89%. This bothered me for no other reason than I am pretty neurotic.

The other problem is that at night-time, I wanted to be able to easily set my brightness to just slightly above 0% to reduce strain on my eyes while using my laptop in total darkness. I also wanted to be able to turn my screen off using the brightness controls because my partner enjoys listening to netflix shows with the screen off while she's trying to sleep. At the settings I had initially, I could turn the screen off but once I increased the brightness, it increased to a value of 9, which is too bright for an initial value in my opinion. To solve this, I wrote two bash scripts to handle the brightness and ensure the output of multiples of ten.

To increase screen brightness:


#!/bin/bash
#Created by Brian Winkler

#This script is free to use and modify as your own

#Check out my blog at https://nuxview.blogspot.com/


STATUS="$(xbacklight -get)"
CHECK="${STATUS}"

if [[ $CHECK == 0.000000 ]]

then
 xbacklight -inc 1
 pkill -RTMIN+1 i3blocks

else
 xbacklight -inc 10
 pkill -RTMIN+1 i3blocks
fi


This script checks if the brightness value is at its lowest and if it is, increases the brightness by a value of 1. Otherwise, it increases the brightness by a value of 10.


To decrease screen brightness:


#!/bin/bash
#Created by Brian Winkler
#This script is free to use and modify as your own
#Check out my blog at https://nuxview.blogspot.com/

STATUS="$(xbacklight -get)"
CHECK="${STATUS}"

if [[ $CHECK == 100.000000 ]]

then
 xbacklight -dec 9
 pkill -RTMIN+1 i3blocks

else
 xbacklight -dec 10
 pkill -RTMIN+1 i3blocks
fi

This script checks if the brightness is all the way up and if it is, decreases it by a value of 9. Otherwise, it decreases the brightness by a value of 10.


For both of these scripts, pkill -RTMIN+1 i3blocks makes it so I can set my interval to once in the brightness display command in i3blocks.conf and then whenever I change the brightness, it automatically reloads the brightness display.


So now my i3blocks brightness block is using only multiples of ten and allows for me to turn my brightness off and when I turn it on, it first sets the brightness to the lowest possible value.

I then made these scripts executable using chmod +x and copied them to /usr/local/bin/ and named them brightinc and brightdec respectively.


My new ~/.config/i3/config looks like this:


#Brightness controls
bindsym XF86MonBrightnessUp exec brightinc
bindsym XF86MonBrightnessDown exec brightdec


These scripts as also available on my i3blocks github.


If you have any questions or comments, please feel free to contact me or to comment here. I would love to hear from you!


StumbleUpon

Monday, September 12, 2016

Create Linux users using a C program

Today, in order to further familiarize myself with C programming, I wrote a program to automate the process of creating new users. This program is for personal use only, meaning if you are running this on a server with many users, you run the risk of something being passed to the program that can harm your system.

Here's the source code:


#include <stdio.h>
#include <stdlib.h>

//Created by Brian Winkler
//Create new user

int main (void) {
        char user[128];
        char add[128];
        
        
        printf("Enter a user name:\n");
        scanf("%s", user);
        
        snprintf(add, sizeof(add), "useradd -m -G users -s /bin/bash %s", user);
        system(add);

        printf("User %s created!\n", user);
        return 0;
    
    
}

It's a very simple program but through compounding Linux commands, a very powerful program can be created. This program has been tested on Arch Linux and Ubuntu 14.04.

This source code can also be found on my github.


StumbleUpon

Sunday, September 11, 2016

i3 Window Manager Configuration

As of late, I've been rather obsessed with tweaking my i3 Window Manager configuration. I'm utilizing i3blocks for the i3bar and of course, these config files are dependent on having the proper packages installed that are called in execution.

Here's a screenshot of my desktop:

i3 window manager desktop configuration
Desktop


Some highlights of my configuration:

-Key bindings for the volume, brightness, play/pause buttons.

-Sshuttle VPN notifier. Sshuttle allows me to bypass my school's firewall that prevents VPN connections.

-Pastel colors for a soft and appealing desktop.

-Display of both local IP address and external IP address.

-Active window notification.

-Source Code Pro font package for improved appearance.

Notes:

-Some of the config file and scripts are tweaked versions of scripts created by others. In order to insure intellectual integrity, the proper attributions were left in the script files.

-Some blocks are on a long refresh interval to reduce system resource use. In order to keep them current, I use '$mod + Shift + r' to load them upon change.

-There is a one second lag on the brightness and volume changes but the settings for quicker updating ate up too much of my processor to be viable.

-I do not use a compositor. I tried compton but I actually noticed a performance drop. I attribute this to having an Intel video card, which is supported in the kernel.

-I am also using kupfer instead of dmenu.


If you have any questions or comments, please feel free to share them!

Also, if you too are struggling with aggressive firewalls, I am willing to offer a free user account on my digital ocean droplet for use with sshuttle for those that ask!


StumbleUpon

Thursday, September 8, 2016

SSH out of network that is disabling your VPN

So school has started back up this semester and over the summer break, the IT department stepped up their game. I used to be able to run my tor-broswer and connect to my VPN and probe the hell of out the network using nmap. It seems those days are over.

But I can't accept that, so I immediately set about trying to figure out how to beat their new level of security and finally be able to torrent the newest release of Arch Linux to update my recovery USB (my school has impressively good bandwidth).

I quickly came across sshuttle, a service that allows you to redirect all of your internet traffic through ssh, which was an open port on this network that wouldn't let anything else get through. The only requirement is root access on the local machine and user access on the ssh destination.

sshuttle is available in the Arch community repository. It depends on iptables being property set up on the local machine.

In order to automate this process, I wrote two scripts. One to call sshuttle and one to kill it. I then saved these scripts to my /usr/bin directory in order to call these commands anywhere in my system.

Here's the script to start sshuttle:


#!/bin/bash
##Written by Brian Winkler
##Liscensed under the GPL
##Check out my blog at https://nuxview.blogspot.com/
##COntact me at <brianewinkler@gmail.com>


##Run sshuttle

##Replace [user@host] with your ssh login credentials
sshuttle -D -r [user@host] 0/0


And here's the script to kill the tunnel:


#!/bin/bash
##Wrttten by Brian Winkler
##Licensed unde the GPL
##Check out my blog at https://nuxview.blogspot.com/
##Contact me at <brianewinkler@gmail.com>


##Get process id
PROCESS=$(pgrep sshuttle)

##Store PID in kill command
##Not the most elegent solution but it gets the work done
KILL_PROCESS=$(kill -9 $PROCESS)

##Execute kill command
echo $KILL_PROCESS


Once sshuttle is running, I am fianlly able to connect my VPN and ensure the anonymity of my internet traffic whilst in public.


Both of these scripts are available on my github page. Hopefully, if you're having issues using a VPN on a public network, these work for you!

Please feel free to post any questions or comments!


StumbleUpon

i3Blocks PPTP Status Indicator

Here is yet another bash script for i3Blocks in the i3 Window Manager. This one is very similar to the VPN Status Indicator I posted previously except this applies to PPTP tunnels.

Read more about i3Blocks here and read my review of the 3 Window Manager here.

Here's the script:

#!/bin/bash
#Created by Brian Winkler
#Licensed under the GPL
#See more scripts at https://github.com/BrighBrigh/i3Blocks
#And check out my Linux blog at https://nuxview.blogspot.com/


##Check PPTP status
##Edit this file to show a unique output for when you have PPTP tunneling turned on
##Change "ppp0" in both places to fit your needs
GET_PPTP=$(ip addr show | grep pp0 | cut -d ' ' -f2 | cut -d ':' -f1)

##Store status in STATUS
if [[ $GET_PPTP == *"ppp0"* ]]
then   
    STATUS=ON
else
    STATUS=OFF
fi


#Print status
echo $STATUS
echo $STATUS


##Colors
if [[ "$STATUS" == "ON" ]]
then
    echo "#00ff00"
else
    echo "#ff0000"
fi


And once again, this script it available on my i3Blocks github page.

Please feel free to post any questions or comments!


StumbleUpon

Wednesday, September 7, 2016

i3Blocks Show External IP Address

To continue my series about tinkering with i3Blocks, I created a script that utilizes wget to return my external (or public) IP address and display it in the status bar. Read more about the i3 Window Manager here.

It's a very simple script that uses an external server to identify the IP address and prints it to that status bar.


#!/bin/bash

IP=$(wget http://ipinfo.io/ip -qO -)
echo $IP


I will be keeping a complete collection of my scripts on my github.

Please feel free to comment or to ask questions!


StumbleUpon

i3Blocks VPN Status Notifier

I wrote a bash script to handle the status of my VPN. When disconnected, it displays "OFF" in red text and when connected, it displays "ON" in green.

Here's the script if you want to use it or modify it to fit your system!


#!/bin/bash


##Check VPN status
GET_VPN=$(nmcli con show | grep tun0 | cut -d ' ' -f1)

##Store status in STATUS
if [[ $GET_VPN == *"tun0"* ]]
then   
    STATUS=ON
else
    STATUS=OFF
fi


echo $STATUS
echo $STATUS


##Colors
if [[ "$STATUS" == "ON" ]]
then
    echo "#00ff00"
else
    echo "#ff0000"
fi


StumbleUpon

Monday, September 5, 2016

i3Blocks for the i3WM

I've recently removed GNOME entirely and am using the i3 Window Manager as my daily driver with pleasing results. You can read my review of the i3 Window Manager here.

Through utilizing the i3blocks-git package in the AUR, I've been able to achieve a level of customization for the i3 bar that I'm finding very satisfying.

i3 bar customized with i3 blocks in the i3 Window Manager


I'm using both the default i3 blocks scripts along with Anachron's scripts and some personalized ones. Anachron's scripts provided me with the ability to increase and decrease my volume by clicking on the icon, increase and decrease my brightness by clicking on the icon, etc. Check out Anacron's scripts for some well written scripts to improve the already great i3 blocks!

Scripts can be added to /usr/lib/i3blocks/ and made executable using chmod +x. Then, these scripts can be called by adding them to the ~/.i3blocks.conf text file.

Please feel free to share your own i3 blocks set-up here!


StumbleUpon

Friday, August 19, 2016

Fix Steam using Alias

In an earlier post, I talked about utilizing aliases to shortcut commonly used commands. Today I'm going to share share my fix to a common error with Steam.

The error stems from the Steam run-time libraries  being older libraries than what are installed by default in Arch. More can be read about this error here. Every time Steam updates, it causes an error as it adds those out-of-date libraries back to the Steam run-time.

Now, to fix this, I chose to delete the libraries that steam adds. This can become a tedious task as Steam seems to update every two days. I fixed this problem by adding the following alias to my '~/.bash_aliases' file:

#Fix steam
alias fixsteam='find ~/.steam/root/ \( -name "libgcc_s.so*" -o -name "libstdc++.so*" -o -name "libxcb.so*" -o -name "libgpg-error.so*" \) -print -delete &&  find ~/.local/share/Steam/ \( -name "libgcc_s.so*" -o -name "libstdc++.so*" -o -name "libxcb.so*" -o -name "libgpg-error.so*" \) -print -delete'


So now, whenever Steam updates, I run the 'fixsteam' command afterwards to immediate fix this error and get right back into gaming!

Please feel free to post your thoughts/comments/hatred!


StumbleUpon

Friday, August 12, 2016

How to write a "Best Linux Distros" post

flowchart
StumbleUpon

Using Swap and hibernate on an SSD: Why do it?

ssd
Taken from http://pcmag.com. I'm going to pretend the GPL covers this.

When setting up SSDs on Linux systems, it is generally recommended that you don't set up a swap file and in turn, don't set up hibernation. This is because the more writes to an SSD, the quicker the cells wear out and the more rapidly a SSD approaches failure. But when it comes down to it, how realistic and reasonable is this advice?

I started looking into this because I am zealous about preserving my laptop battery. Last time around, my laptop reached the point where it lasted about 30 minutes before dying on a full charge. This was only a year after replacing my battery. The problem was I had bad battery practices such as leaving it to charge overnight and letting my battery regularly fully discharge which is really harmful to Lithium-Ion batteries. Knowing what not to do, I set out setting up preventative measures so this wouldn't happen to my new Dell XPS 13.

The problem was that GNOME is set up to automatically shutdown at 5% battery, lower than the recommended 7% for Lithium-Ion batteries and the much safer 10%. While setting about changing this, I learned that the easiest and most efficient way to do this was setting up hibernate on my computer and making it hibernate at 10% battery. And this led me to my next problem, which was that hibernate is only available if you have swap, a process recommended against for SSDs, set up.

Lots of searching led me to two camps of thinking. The first being that Swap is a no-fly zone for those wishing not to break their hardware, and the second being that this is an over-cautionary suggestion with some actual merit but no actual practicality.

M.2 Type 2280 SSDs, like the one in my XPS 13, have an average estimated life of 380TB worth of writes. For a conservative estimate, I will say that it gets 300TB, or 300,000GB worth of writes. Since my Swap is the same size as my RAM (8GB), each time the computer hibernates, it writes 8GB (actually more like 2 or 3 GB but like I said earlier, conservative estimates) each time it hibernates.

So 300TB divided by 8GB each time it hibernates comes out to 37,500 writes due to hibernation before the SSD burns out. If I hibernate once a day (divide by 365), then it will take me 102 YEARS to burn out my SSD. In actuality, I only hibernate more like once a week due to my not paying attention to my battery life (divide 37,500 by 52) which means it will take 721 years to burn out my SSD. The longest I need this SSD to last is at most, 5 years. By then, I will want to upgrade anyways. But I also need my battery to last these 5 years and in my experience, they typically don't last that long. Its a trade I'm willing to make.


StumbleUpon

Easy First Time Kernel Compilation for Arch Linux

If you have a deep understanding of kernel compilation and the necessary steps to take to support your hardware from scratch using a kernel straight from kernel.org, then this article is not for you. If you've never compiled the Linux kernel before and want a safe and straightforward way to do so, keep reading. Will this significantly speed up your system? Not particularly. But if you're itching to compile your own kernel just for the sake of doing so, this is definitely the place to start.

All of these steps can be found on the Arch Wiki Kernel Compilation page. It is really clear and easy to follow but sometimes, step-by-step guides that don't show you a bunch of different methods of accomplishing each task are helpful. This guide will be aimed specifically at the Dell XPS 13 Developer Edition but is applicable to all computers running Arch Linux.

Set-up:

The first step is to make and enter a directory to work in while compiling the kernel, as per the Arch Wiki.


mkdir ~/kernelbuild && cd ~/kernelbuild

The next step is to download the kernel you wish to compile. This guide will be using the mainline kernel, which at the time of writing this article, is 4.7.0. If you wish to work with a different kernel, simply right-click the tar.xz link next to the one you wish to use and click Copy Link Address and place it after wget.


wget https://cdn.kernel.org/pub/linux/kernel/v4.x/linux-4.7.tar.xz

Now, extract the tarball and change directory to the unpacked tarball


tar -xvJf linux-4.7.tar.xz && cd linux-4.7

Even though its a freshly unpacked tarball, the Arch wiki recommends making sure the directory is clean anyways.


make clean && make mrproper

As an easy starting point, copy over your config from your current Arch installation.


zcat /proc/config.gz > .config

Arch is known for their kernel stability so it will be sure to include you need for your system to boot as a starting point. Instead of adding to what you will be compiling, you will be taking unnecessary options out. This way, if you are unsure about anything, DO NOT REMOVE IT.

Configuration:

Now, you have a couple of tools for going about setting options. I chose to go with 'make gconfig' since I'm running GNOME and like that it automatically describes what each option does at the bottom of the interface. So, go ahead and run your preferred configuration.


make gconfig

There are three states for the boxes. Blank means the option is not chosen, a check-mark means it will be compiled into the kernel, and a dash means it will be compiled as a module. Double click the box to cycle through these options. NOTE: I'm not sure if double-clicking is standard or only the case for my system so it may take some playing around to see how changing options works.

1. Processor Types and Features:
Since the XPS 13 uses a 6th generation Intel processor, I removed all other processors. Expand 'Processor Types and Features' and uncheck the AMD processors. If your running an AMD processor, this can be done inversely. Under the same menu, expand 'Processor Family' and chose your processor, in my case this was 'Core2/newer Xeon'. Also, as it currently stands, my processor doesn't support 'Hibernation', so I also disabled this. Also, when it comes to CPU frequency scaling, my processor only supports 'powersave' and 'performance'. I changed these from modules to enabled options and disabled the others, such as 'ondemand'.

2. General Options:
Expand 'General Options'. The only things I touched in this section was the 'Default Hostname' and 'Local Version' since I wanted to feel cool and put my own hostname into the kernel. Click on the option then single click on the text to the right. For example: click 'Local Version' and move over to where it says '-ARCH' and click it once. Double clicking will enable and disable editing the text rapidly and make it seem like you can't change this option. I changed mine to '-CUSTOM'.

3. Device Drivers:
Expand 'Device Drivers' then expand 'Graphics Support'. Disable all options that you KNOW aren't your graphics card. If you're unsure about anything, DO NOT DISABLE it. But things you are sure about, such as support for NVIDIA cards, disable.

4. Security Options:
The only thing I added here was 'Restrict unprivileged access to the kernel syslog'.


These are only a few of many options. As I mentioned earlier, you can read about each option at the bottom of the interface so go through and do some research to see what each one is/does and if you should disable/enable it. THIS WILL TAKE SOME TIME! But, it can end up being one of the most rewarding parts of learning about how the kernel operates. Once you have finished, click the save button at the top and kill gconfig.

Compiling:

This part is easy but takes quite some time so be prepared for that:


make

And wait. Then keep waiting. Then wait a little more. Now its done!

From this point on all commands MUST be run as root in order to work.


sudo su

then


make modules_install


Now, you'll copy over the image you just made to your boot partition and name it as you so desire.


cp -v arch/x86_64/boot/bzImage /boot/vmlinuz-[YOURKERNELNAME]

Finally, you'll generate the initramfs files. I chose the manual method of accomplishing this task. It is structured like so:


mkinitcpio -k <kernelversion> -g /boot/initramfs-<file name>.img

Replace file name with your kernel name and if you are unsure about what to put for the kernel version, check the output of:


ls /lib/modules/

This will list all available module directories and you should see the one that you created earlier in this process. If you don't go back and make sure 'make modules_install' ran correctly. This is crucial! Without the proper modules, you system will not boot!

The final step is to edit you boot settings to boot your new kernel! Check the documentation for your specific boot process, or if you are using systemd boot, continue reading.

Simply edit your '/boot/loader/entries/arch.conf' file to include both your new vmlinuz file and your new initramfs file. If for some reason your system doesn't boot, you can boot with a LiveUSB and edit this file back to its original state. For this reason, do not remove your old kernel files from the boot partition!

And there you have it! A simple guide to compiling your own kernel. Now that wasn't so hard, was it? Of course, there is a lot more to kernel compilation than this guide covers but like I said earlier, this can help you feel more comfortable with the overall process. If you follow this guide, please don't let this be the "end all" for your experiences with kernel compilation! There is still a lot more left to learn, such as making a PKGBUILD so that future updates don't accidentally change your system state to using the old kernel. Look out for a simple PKGBUILD guide here in the future!

Questions/comments/hate mail? Please feel free to use the comment box below this post! I'd love to hear from you, even if it is just about how much you hate me and everything I stand for!


StumbleUpon

Wednesday, August 10, 2016

The i3 Tiling Window Manager: A Short Review

When I first head someone talking about "the i3", I immediately pictured Intel processors and was confused as to why someone was expressing so much satisfaction for what I consider to be a very basic processor. Boy was I wrong.

The i3 Tiling Window Manager is the epitome of efficiency on the Linux desktop. With just a terminal running, the environment is taking up a mere 186MB of memory; GNOME clocks in at just under 800MB. Since it's a window manager and not a full desktop environment, its also taking up less of the processor. On first boot, this is noticeable. Everything runs faster. Windows load quicker, web pages load more immediately, applications open without hesitation, and steam runs without any stuttering.

i3 is available in the Arch Linux repos. I recommend also installing 'dmenu', as i3 relies heavily on it in order to function as intended.

As opposed to editing my '~/.xinitrc' configuration, I chose to launch this Window Manager utilizing:


startx /usr/bin/i3


Since i3 is focused on efficiency, most tasks can be accomplished on i3 without using a cursor at all. The manager relies on a series of keyboard shortcuts to optimize workflow efficiency and of course, there is a learning curve. For me, its taken about an hour of consistent use to feel like I can practically apply the shortcuts in an efficient manner.

i3 Window Manager


Everything centers around the 'modifier' button, which can be chosen on first boot or later can be configured in the /.config/ files. I chose the windows key as this is already the key I most heavily depend on in GNOME.  From here, you can use either the default shortcuts or you can configure your own.

Some examples of default shortcuts:

'mod' + 'enter' = New terminal window

'mod' + 'arrow key' = Moves window focus

'mod' + 'v' = Opens next window vertically in the current work-space

'mod' + 'h' = Opens next window horizontally in the current work-space

'mod' + 'd' = Opens dmenu to search for applications to launch

'mod' + 'number' = Switches to work-space 'number'

'mod' + 'shift' + 'number' = Sends the current window to work-space 'number'

'mod' + 'shift' + 'q' = Quits current application


'mod' + 'shift' + 'arrow key' = Move the current window around the work-space.

'mod' + 'shift' + 'e' = Exit i3

For more shortcuts, you can read the config files. You can also set custom shortcuts bound to applications.


Simplicity is the name of the game here. At the bottom of the screen you'll see which work-space you are currently operating in, the amount of disk space available, VPN status, WiFi status, Ethernet status, Battery percentage and time, and the time and date.

i3 window manager


Once you have mastered the basics, combining these shortcuts rapidly will create efficiency like never seen before in your desktop. Coupled with the speed from how light-weight it operates, I can see this window manager becoming my daily driver on my laptop running Arch, Though I will keep GNOME around for when I need to show off how beautiful Linux can be to those I'm trying to convert.

Please feel free to comment and share your own experience with i3 along with any questions/comments!


StumbleUpon

Sunday, August 7, 2016

Puppy Linux Quirky: A review

There are many minimalist Linux based distributions but one in particular comes to mind when talking about minimalist distributions that can also exist as a persistent installation on a USB drive, Puppy Linux.

Now, a persistent installation is different than a LiveUSB in the sense that on a LiveUSB, when you download packages, change settings, and edit files, they all disappear when you reboot. This has it's advantages when it comes to recovering a broken system. These traits make it so that no matter what happens, the LiveUSB will always start up on reboot, allowing you to have a reliable and safe alternative to booting up your computer. A persistent installation is not these things.

A persistent installation operates as more of a full operating system that runs entirely off of a USB drive. You can download packages and write documents, and when you reboot, all of these files are still there. Its more like if you installed a full distribution on an external hard-drive that you could boot up. The advantage of this is that USB drives are small and depending on the brand, durable. For this reason, I keep a Puppy Linux persistent installation on a USB drive attached to my keys. It has 64GB of memory, which is an excessive amount of space for this particular distribution. Puppy Linux is covered by the GNU/GPL licenses and was first created by Barry Kauler in 2003. Since then, many different forks of this distribution have been released, with some being directly supported by the Puppy Linux Project. I opted for the 'Quirky' version and that what this review is based upon.

PROS:

-I literally have a Linux distribution that I can access everywhere I go. This has helped me at work with diagnosing problems on our Windows boxes, circumventing security software that is running on my school's library computer (not for malicious reasons but because it has such a strict rule-set, it deters any sort of good research. It's college for Christ-sake, sometimes I need to google unsavory things.), and test whether a Windows box needs new hardware or if its just Windows being awful (its always the latter, by the way).

-It runs completely out of the computer's RAM. That's right, entirely. So this means that system processes aren't causing constant read/writes to the USB stick, quickly wearing it out. It also means that it's very snappy, even on older computers.

-On boot, it automatically detects the computers hardware and loads the corresponding modules for just that hardware, again adding to its responsiveness. Every windows box I've plugged it into had booted without any issues. I also didn't have any issues using it on a MacBook Pro but I couldn't get it to run on one of those newer desktop macs (can't win em all).

CONS:

-It looks like you're booting a Linux system from 2003. It doesn't have a lot of the bells and whistles that more modern desktop interfaces use. Also, the desktop isn't very configurable. I can change things such as font, panel colors, and the icon set, but when it comes to adjusting the applications menu layout, I haven't had any luck. This is especially a drawback since, to me, the layout doesn't feel very intuitive and I often have to spend more time than I would want trying to find the package manager, which leads me to my next con.

-The package manager, Puppy Package Manager. It isn't very intuitive and isn't something you could hand to a beginning user and expect them to be able to find and download the packages they are looking for. On top of that, it isn't friendly to the advanced user as it cannot be operated from the command line. It requires that it's run using the GUI, which I personally am not a huge fan of.

-I'm sure this is just me being nit-picky, but in order to install the OS, I needed to 'dd' the .iso to one USB stick, live boot into this stick, then install it on the separate stick that I wanted to use it on. This felt like kind of a round-a-bout process but really isn't something I should be complaining about.


Summary:

Puppy Linux Quirky is a great way to have a Linux based distribution everywhere you go, especially if you are reliant on Linux-only tools. It's documented and supported well enough that you can find solutions to most major fixes. But this is not the distro I would pull out when trying to convince friends/family to switch to Linux.

What do you think? If you have any thoughts/questions/anger, please feel free to comment or contact me!


StumbleUpon

Friday, August 5, 2016

Recovery USBs

I am working on some longer articles but I wanted to throw this one out into the ether.

Something I've learned is to keep my Arch LiveUSB stick with me everywhere I go. I keep it in my laptop sleeve case. I can't count the amount of times I've broken my system in random public places and was so relieved to happen to have my LiveUSB with me. I've never ran into a problem I couldn't fix when breaking my system just by mounting my root and /boot partition and 'arch-chroot'-ing into them.

Its a simple thing you can do that will save you a lot of headache.


StumbleUpon

Thursday, August 4, 2016

GNOME Shell Extensions: A short guide

Today I want to talk about GNOME Shell extensions. Specifically because it took me a while to get turned onto them and once it happened, it really changed my workflow.

The GNOME Tweak Tool, available in the AUR, makes activating Shell extensions very simple. Simply open the Tweak Tool interface, navigate to the Extentions tab, and click 'User Themes'.

From here, you can either download specific extensions or you can utilize the AUR to automatically download and install the packages. I chose the latter.

A problem I ran into was that I would activate extensions in the Tweak Tool and they wouldn't load. I was running a newer version of GNOME than specified in the extensions that I had downloaded. This can be fixed by navigating to /usr/share/gnome-shell/extensions/ directory, entering the directory for the particular extension that isn't working, and editing the metadata.json for that extension to include the version of GNOME you're using (in my case 3.28.3).

All of the extensions I used are available in the AUR and I found all of them to be excellent contributions to my work-flow along with helping give my desktop environment a more modern feel.

Drop Down Terminal:

The Drop Down Terminal extension is by far my favorite. This adds a terminal emulator to your desktop that you can easily access by hitting the '~' button. Its dynamic in the sense that if your cursor is activated to type, such as in LibreOffice Writer or Chromium, it doesn't accidentally pull down the terminal when you need to utilize the "~" button. This extension has added so much productivity to my workflow as I can easily pull down a terminal and hide it as I go about tasks. It's available for download through the AUR as gnome-shell-extension-drop-down-terminal


drop down terminal


Dynamic Top  Bar:

If you've played around with Elementary OS, when you know how beautiful their desktop interface looks. One of my favorite aspects is the transparent top bar that dynamically becomes solid once you maximize an application. the Dynamic Top Bar extension brings this function to the GNOME desktop. It's available through the AUR as gnome-shell-extension-dynamic-top-bar.

Open Weather:

The Openweather extension adds your local weather to the top bar of your GNOME desktop right next to the time in the center of the top bar. It's easily configurable and provides you with the current weather, the day's forecast, and the previous day's weather. 


weather


It's available for installation through the AUR as gnome-shell-extension-openweather-git.

Top Icons:

One of the few things that I dislike about the GNOME desktop is that it displays tray icons from a pull-out panel on the bottom left of the screen. It feels counter-intuitive to me and always seems to confuse non-Linux users when I am trying to show off my desktop. I would sometimes forget it was there and the find that I have three or four programs running that I had forgotten to completely exit out of. The Topicons extension moves those icons up to your top bar so that you can always see them. In the previous pictures, you'll notice that Hexchat is up in my top panel and that's exactly what this extension does. It's simple yet something that I really appreciate. Its available for installation through the AUR as gnome-shell-extension-topicons-plus-git.


Pomodoro:

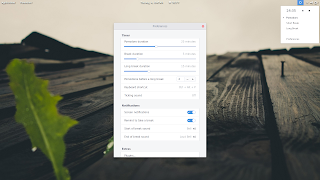
This extension is based on the Pomodoro Technique, "The Pomodoro Technique is a time management method developed by Francesco Cirillo in the late 1980s. The technique uses a timer to break down work into intervals, traditionally 25 minutes in length, separated by short breaks. These intervals are named pomodoros, the plural in English of the Italian word pomodoro (tomato), after the tomato-shaped kitchen timer that Cirillo used as a university student. The method is based on the idea that frequent breaks can improve mental agility" (taken from Wikipedia).  This extension adds a plugin that utilizes this technique which I find useful for when I'm working on big projects. You can configure exactly how long you want each shot-break to be along with how long the long-break to be, as well as setting how many short breaks you want to have before a long break. 


pomodoro


Once the timer runs out, it darkens your screen and displays a count-down timer that shows you what type of break you're currently taking.


pomodoro

This extension is available for installation through the AUR as gnome-shell-pomodoro.

Conclusion:

There are many more extensions that can be added and they can all be found at https://extensions.gnome.org/. I'd suggest browsing through and seeing if there are any other extensions the pique your interest. Please feel free to post any comments regarding what you think about these extensions along with any suggestions you have. Thanks for reading!


StumbleUpon

Tuesday, August 2, 2016

Fun with the alias command

While researching ways to maintain Pacman on my Arch Linux installation, I stumbled across someone's suggestion to create an alias to shorten an otherwise lengthy and hard to remember command. I gave this a shot but when I ran the command, I was getting an error. I double checked that the alias package was indeed installed in my system and after some research, found that I needed to edit my ~/.bashrc profile by adding the following text:


if [ -e ~/.bash_aliases ]
then
. ~/.bash_aliases
fi


From here, I needed to create the ~/.bash_aliases file:


touch ~/.bash_aliases


Finally, I set up as many random custom aliases I could think of to improve my workflow. Here is the output of the aliases I set up:


##Custom aliases##

#Auto-clean Pacman
alias pacclean='sudo pacman -R $(pacman -Qdtq)'

#Chdir to Downloads
alias cdd='cd ~/Downloads/'


#chdir up 2
alias up2='cd .. && cd ..'

#chdir up 3
alias up3='cd .. && cd .. && cd ..'

#cdhir home
alias cdhome='cd ~'

#Pacman Upgrade
alias pacgrade='sudo pacman -Syyu'

#Watching Netflix
alias netflixon='gsettings set org.gnome.settings-daemon.plugins.power sleep-inactive-ac-timeout 7200 && gsettings set org.gnome.settings-daemon.plugins.power sleep-inactive-battery-timeout 7200'

#Done with Netflix
alias netflixoff='gsettings set org.gnome.settings-daemon.plugins.power sleep-inactive-ac-timeout 2700 && gsettings set org.gnome.settings-daemon.plugins.power sleep-inactive-battery-timeout 900'


The Netflix aliases are due to the fact that I never seem to be able to get the Caffeine plugin to work and I would rather address this from the terminal anyways. netflixon sets auto-suspend to two hours for both A/C and battery. netflixoff sets it back to my preferred settings, 15 minutes on battery and 45 minutes on A/C. Note: the Netflix aliases will only work for GNOME.

Let me know what you think! Or if you see any errors or have other any useful aliases!

StumbleUpon

The Dell XPS 13 (Developer Edition)


Last me just say, I spent hours researching Linux supported laptops and the best reviews were always for the Dell XPS 13. It looked sleek with its aluminum body, minimal weight, and infinity display. I decided to opt for the Developer Edition for a variety of reasons which I will address further in this article, but the biggest reason was the it ships with Ubuntu 14.04 so I knew the hardware would be Linux compatible.

When I opened the box, I was actually concerned at how small this laptop seemed. But once I opened the lid, that concern was dispelled upon seeing the infinity display.


Set-up:


On first boot, the Ubuntu set-up menu came up and I followed the process out of impatience for wanting to play with my new laptop. Once I played with Ubuntu for about five minutes, I busted out my trusty UEFI Liveusb of Arch Linux and wiped Ubuntu off the device real quick. I followed [THIS] installation guide which is very solid. But, once I upgraded my Arch system after booting for the first time, my system broke. My root partition upgraded to the 4.6.4 kernel but my /boot partition remained operating with the 4.1 kernel.

The problem was simple, My root partition and /boot partition were not communicating due to improper mounting. This seems to be a common pitfall of installing Linux on an UEFI system, since it's formatted to fat32 and I choose to use systemd-boot as the guide suggests. The fix was generate an fstab file so these two partitions could communicate. Once I generated this file using the UUID of both partitions, my problems were fixed.

The processor:


Since I love playing games (yet aware that a laptop is the not ideal route for 3D gaming), I quickly installed Steam and downloaded an indie game I’ve found enjoyable, The Long Dark. Surprisingly, the game was running at a lower frame-rate at the lowest quality settings for the XPS than my 2008 MacBook Pro. This perplexed me as one of the reasons I chose this laptop was that it had a dedicated Intel® HD Graphics 520 graphics card. Thanks to the Arch Linux forums, someone recognized that I had one of my flags in my mkinitcpio.conf was loading frame buffer compression for the i915 driver. After altering i915.enable_fbc=1 to i915.enable_fbc=0 in my MODULES options, the system was running the game on high quality textures without any lag. Though I'm sure this means sacrificing some battery life.

I decided to further the endeavor for smoother gaming by also installing Openbox for when I run steam. With this flag enabled, I'm feeling the performance I'd expect out of a machine with a dedicated graphics card, another reason I went with the XPS 13.


Battery:


Since this is a laptop, I installed tlp and thermald through the AUR to optimize battery life. Currently, the only I've found that I get about 8 hours of battery life out of light use (web browsing, document writing). And when I'm running something that is demanding for the processor (such as compiling a custom kernel), I've been getting about 3 hours of battery life. Watching Netflix in chromium seems to balance out around 5-6 hours of battery life. From a dead battery, it take about hour and a half to recharge back to full which feels very rapid to me. Overall, I’m really pleased with the length of the battery life.

Wireless:

What I didn’t realize when opting for the Developer Edition was that this meant instead of it shipping a Broadcom wireless card requiring proprietary software,  it shipped with an Intel 8260 wireless card which is currently supported in the Linux kernel and runs at incredible speeds. Previously, I was getting about 300 KB/s for download speeds on my 2008 MacBook Pro running Arch while sitting in my bedroom. With the XPS 13, I’m getting just under 2 MB/s! This increase feels blazing fast to me. To handle wireless, I went with NetworkManager since it works natively in GNOME and had no issues with setting it up.

Graphics and Display:


From the reviews I read, benchmark tests placed the FHD version with an Intel i5 processor alongside the QHD version with an Intel i7 processor. Since I had absolutely no intention of ever using a touch-screen on my laptop, I decided the FHD screen would fit my needs and my budget. Since I opted for the non-touch version, my screen resolution is significantly lower than that of the touch versions (1920 x 1080 vs 3200 x 1800), but I’m still highly satisfied with the display.


Keyboard:


The keyboard is set up beautifully and is very responsive with a nice feel. The back-light is well designed and the BIOS are set up so that it fades to off automatically after a few seconds of inactivity, a feature which I find to give this computer a very modern and elegant feel.


Touch-pad:


Upon installing the synaptics driver, my touch-pad has worked pretty perfectly without much need for configuration. The only real change I made was to reduce the Clicktime variable, which mostly just makes me feel like my system is more responsive.


Webcam:

Warning: It's weird. It's located in the bottom left of the screen due to the infinity display which create a weird angle for video chatting. But when it comes to Skype sessions, it's not that big of a deal for me. If you were shooting for a webcam with good commercial production value, this is not the computer for you. But if you're like me and only occasionally video chat with other folks, it's pretty sufficient. I would mark this as a compromise but it's a compromise that I, personally, am very willing to make.


Storage:


The version I bought has a 256GB SSD so through utilizing the Arch Wiki SSD Optimizations, that need was met. I've already managed to fill about 32GB of the drive with just steam games, which worries me since there are no movies or music on it yet. But luckily, I also have a 256GB SSD external hard drive so space shouldn't be too much of an issue.

I also decided to commit a major sin and enable a Swap file, as opposed to a Swap partition or as it's recommended for SSD's, not having Swap at all. Enabling Swap on an SSD is supposed to create unnecessary wear on the drive but upon further research, this wear is actually very minimal. I can't seem to find the article outlining the exact numbers but in order to completely burn out an SSD, you would need to write to the drive something like 20GB a day for ten years. I set my vm.swappiness to a low setting and my system is yet to have even touched it.


Ram:


The developer edition ships with 8 gigs of RAM which I've found this to be more than sufficient to accomplish basically any task I need to. I opened every application I could think of/installed (Steam, Spotify, Skype, Terminator, Chromium plus 6 tabs, the entire Libreoffice suite, gnome calendar, gnome calculator, etc.) and my RAM topped out at about 3GB, out of the 8 available.

As I write this review I'm using 2.65GB of RAM and I'm compiling the Linux kernel, writing this in Libreoffice Writer, and running chromium with three tabs for reference, and I'm experiencing no lag in my applications or window switching. Since I'm a broke college student and never had the opportunity to have a nice desktop rig, this is rather impressive by my standards.


My Desktop:

Lately, I’ve been opting out of using a Display Manager. I’ve found it preferable to not boot straight to a GUI as when I have problems, they are easier to fix from the system terminal. For a Desktop Environment, I chose GNOME 3. I really love the minimalist feel of GNOME and the wide range of people contributing themes to get a sleeker looking system (a huge plus when I’m trying to switch friends/family to Linux). Another big plus of GNOME is the stability. I've never run into a stability problem with GNOME which is something to be said.
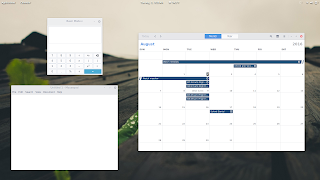
desktop


desktop


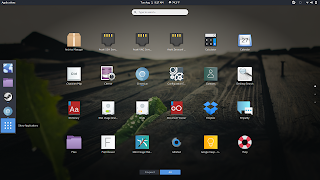
launcher


For my GTK and Shell theme I'm using Arc and for my Icon theme I'm using Vivacious, both of which are available to install through the AUR.


Conclusion:


There are some excellent resources for installing Linux on this machine but lots of research has allowed me to optimize this machine to a level that I'm extremely satisfied with along with compiling a custom kernel to further this optimization. Keep an eye out for a kernel compilation guide for this device in the future.
StumbleUpon